Step 1: Make a plan
Rubber roof coating, also known as elastomeric roof coating, adheres best when it’s applied in warm, dry conditions. A sunny day with temperatures between 50 and 90 degrees will work best. You’ll have an advantage if you plan this project during a favorable time of year.
Make sure to check the weather forecast a few days before you begin. You want the best results, so you’ll need three full days of good weather to allow time to finish the entire process.
Remember, weather that produces dew or frost will interfere with the coating — and cold or humid weather will result in a longer drying time. Push the project back a day or two if the current conditions don’t fall within these guidelines.
Step 2: Choose the right clothing
Cover as much skin as possible by wearing pants, long sleeves, closed-toed shoes, a hat and gloves. The coating can stain and the sun can be brutal on rooftops, so choose items you both don’t mind getting dirty and that shields your skin from harmful UV rays.
Step 3: Clean the roof
Preparation is just as important as coat application. Remove any debris, then wash the roof with a pressure washer at 3,000 psi. Once that’s complete, remove any loose materials to create a clean slate for the coating to adhere to. If there are still contaminants remaining, use RC 300 Cleaner/Degreaser to remove it.
The roof should be allowed to dry completely, so plan for downtime to be up to 24 hours. If needed, use a leaf blower to speed up the drying process.
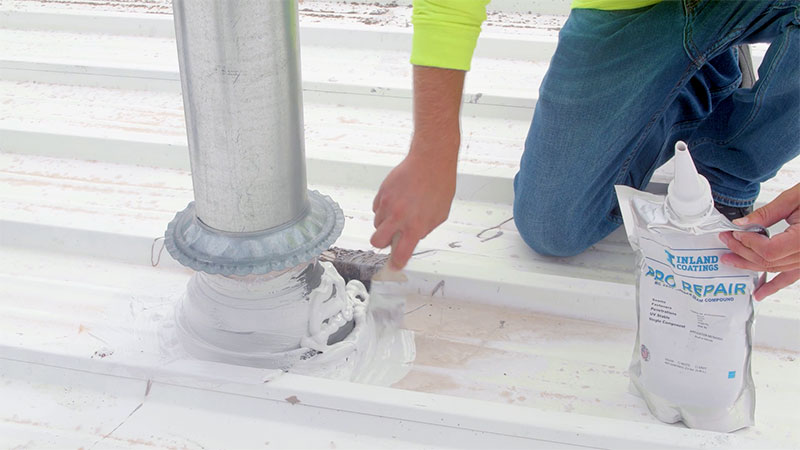
Step 4: Repair any damage
Check for cracks, then seal and repair damaged areas with the right seam compound for your roof type: RC 2250, RC 1850, RC 1950 or RC 1650. Apply the compound to all seams, fasteners and penetration points as well.
If small leaks, seams or rusted areas are left untouched, the new coating will wear out faster than if applied to a clean slate. You want to get the most life out of the rubber roof coating possible, plus set yourself up for a smoother coating process.
If you want to be extra safe, you can seal any skylights, roof vents or protrusions, and reinforce low-lying areas. Taking ample time to prep will extend the life of the roof membrane.
Step 5: Apply a base coat
Most surfaces do not need a base coat or primer, but doing so will prep the roof for better adhesion. Base coating, coating and top coating are all applied in a similar format. See Step 6 for detailed instructions.
- Metal roofs: Use RC-2013 Base Coat to the entire roof surface at a rate of 1 gallon/100 sq feet
- Hypalon & TPO roofs: Use RC-2012 Base Coat at a rate of 1.25 gallons/100 sq feet
- EPDM roofs: Use RC-2012 Base Coat at a rate of .75 gallons/100 sq feet
- Modified bitumen & BUR roofs: Use DF-1050 Base Coat at a rate of 1.5 gallons/100 sq feet
Step 6: Apply the coating
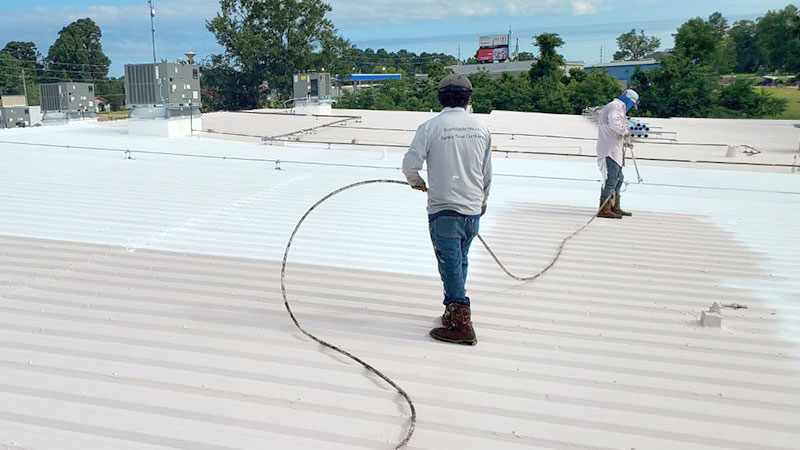
Open the container of coating and mix well. For those wondering how to apply rubber roof coating, the application is very similar to paint, which means there are multiple options. Here are the different techniques, and our tips for using each tool:
- Brush or bristle broom: Use long, even strokes and avoid using too much at once.
- Roller: Choose one with a medium or long nap that’s able to cover textured surfaces. The roller should be heavily coated during application and slide across the roof as opposed to turning over. Think of it as spreading the coating around instead of painting it on.
- Sprayer: Ensure the sprayer is airless and has at least 3,000 psi.
No matter which application method you use, keep these tips in mind:
- Applying a thin second coat will lead to a better final product than applying one thicker coat.
- Avoid making touch-ups until the coating is completely dry.
- Make sure the coating dries and cures between each subsequent coat. This step may take 24 hours or longer. If the weather is wet, it can take weeks for the coating to fully cure.
- Apply the second coat in the opposite direction of the first to make sure every inch is covered.
Once the first coat is fully dry, repeat these steps and apply the second coat.
Pro Tip: Set up your ladder where you want to exit the roof and start the application on the opposing end. Then, finish the last portion while standing on the ladder.
Step 7: Apply a top coat
Top coats are not always necessary, but they can further prevent water from entering the building and provide protection from UV rays. It has many of the same characteristics as the main coating but will help the liquid rubber roof last even longer than without it. Use RC-2014 Top Coat on metal roof coating projects or RC-2018 Top Coat on Hypalon, EPDM, TPO and Modified Bitumen and BUR roof coating projects.
We understand that not everyone will feel comfortable DIY-ing this type of project. If you happen to fall into that camp, don’t be afraid to enlist a professional. We can help connect you to a local contractor who has experience with how to apply rubber roof coating, does fantastic work, and will get the project done in a timely manner.