Rubber roofing installation is a whole different ballgame than traditional flat roofing installation. Instead of solid materials layered on top of plywood, as traditional flat roofing is, rubber roofing is applied as a liquid coating. Then, it’s left to cure and strengthen.
When replacing a flat roof, the old materials have to be stripped, but rubber coatings can be applied directly on top of the existing roof. Removing that step alone saves your crew a lot of time and energy. There are three main steps to installing or applying an EPDM rubber roof membrane, which include preparing the roof, repairing damaged portions and applying the new coating.
Preparation to Install Rubber Roofing
This might be the most crucial step of installing EPDM roofs, so set aside the time to do it right. Preparing the roof for the new coating will help it adhere better, so it can serve the building for as long as possible.
To begin, remove the loose debris with a leaf blower or broom. Then, use a pressure washer to release additional dirt and grime. If there are contaminants left over, you can remove them with a degreasing product such as our RC 300 Cleaner/Degreaser. Allow at least 24 hours between cleaning and beginning your coating project.
Repairing a Rubber Roof
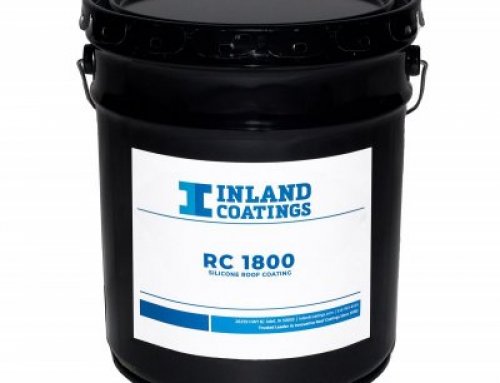
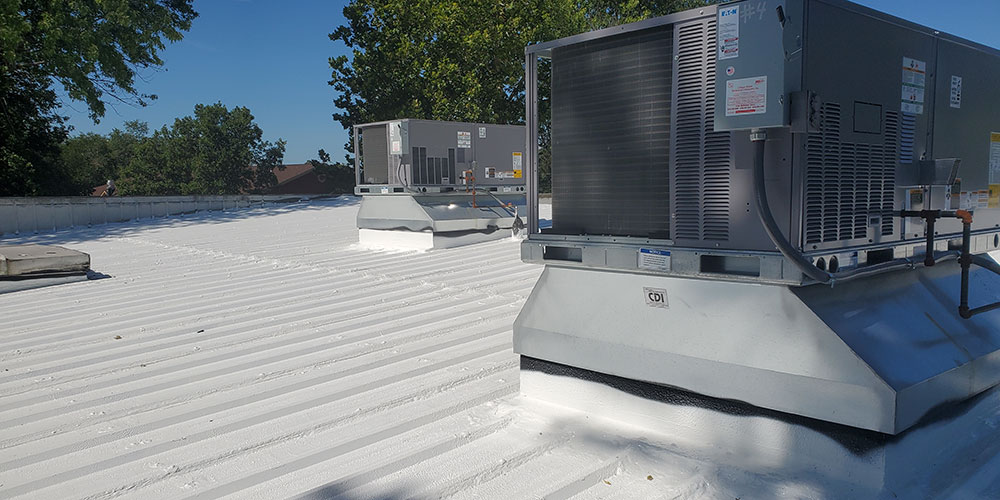
Once the roof is well-cleaned, you can move on to making repairs and sealing vulnerable areas to give them an added layer of protection. Cracks can be repaired using our seam compounds. Different compounds work best with different roof types, so make sure you’re using the right product — RC 2250, RC 1850, RC 1950 or RC 1650. It’s also smart to apply the compound on seams, fasteners and penetration points. In other terms, anywhere that’s more susceptible to leaks.
If problem areas are left untouched prior to laying down the coating, the coating might not adhere as well. Using a seam compound ensures maximum adhesion. For the highest level of protection, use the compound around any protrusion in the roof, including skylights and vents. The more thorough you are with each step, the longer the roof coating will last for your customer.

Application of Rubber Roof Coatings
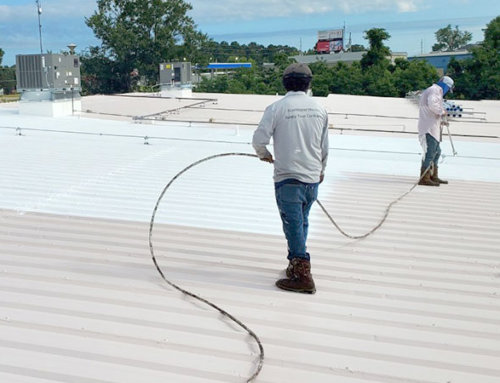
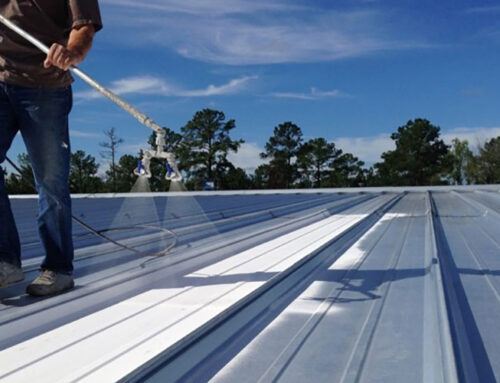
Let’s talk about how to install rubber roofing. Whether you’re applying an Ethylene Propylene Diene Monomer (EPDM) coating to single ply roofing or a roof with multiple layers, including a base and top coat, the process stays the same. Roll the EPDM (Ethylene Propylene Diene Monomer) coating evenly from the center of the roof out to each roof corner. Use a brush, bristle broom, paint roller or sprayer. If you are applying a second coat, keep it thin as that will lead to a better finish.
Then, in between each application, make sure the EPDM membrane is fully adhered before starting the next — or before making touch-ups to the previous application. Normally, that will take 24 – 48 hours. In the case of wet or humid weather, though, it can take days or weeks for the coating to completely cure. You’ll be able to tell when it has cured by the tackiness of the surface. Our best tip is this: avoid applying the second coat while the adhesive is still wet.
You can avoid this by using the correct roof coating for your climate. Silicone coatings use moisture from the environment to fuel the chemical reaction that cures the coating. That means it works better in certain regions of the country or during certain seasons. Acrylic coating, on the other hand, works in an opposing way. The air sucks up the moisture from the coating, helping it cure.
If you have questions after learning more about how to install rubber roofing, contact the team at Inland Coatings to get them answered. We’re happy to help fill in the gaps and get you started providing rubber roofing as part of your roofing services.